The benefits of morning yoga

Wake up Every morning with This Gentle Morning Yoga.
Morning yoga comes with a myriad of benefits that can positively influence your physical, mental, and emotional wellbeing. Starting your day with yoga can set a positive tone for the rest of the day. Here are some of the key benefits:
- Enhanced Flexibility and Strength: Morning yoga sessions gradually improve your flexibility and strength. Over time, you’ll find that poses become easier to hold and your range of motion increases, reducing your risk of injury in daily life.
- Boosted Energy Levels: Yoga in the morning can energize your body and mind, preparing you for the day ahead. Certain poses and breathing techniques increase blood flow and oxygenation throughout the body, helping you feel more awake and alert.
- Improved Focus and Concentration: Starting your day with a yoga practice can enhance your ability to concentrate and maintain focus throughout the day. The meditative aspects of yoga help in calming the mind, which is essential for clear thinking and decision-making.
- Stress Reduction: Yoga is known for its stress relieving qualities. Regular morning practice helps in managing cortisol levels (the stress hormone), promoting a sense of calm and reducing anxiety levels, which can contribute to a more peaceful and productive day.
- Better Posture: Morning yoga sessions can be particularly beneficial for improving posture. Many of us spend hours sitting at desks, which can lead to slouching and back pain. Yoga strengthens and stretches the back, shoulders, and neck, promoting better posture throughout the day.
- Weight Management: Engaging in physical activity first thing in the morning can boost your metabolism, helping you burn more calories throughout the day. While yoga may not burn as many calories as some high intensity workouts, it can still contribute to a healthy weight when combined with a balanced diet.
- Improved Digestion: Twisting poses and forward bends can aid in the digestive process by facilitating the movement of food through the digestive system. Practicing yoga in the morning can help regulate your digestion, potentially reducing bloating and discomfort.
- Cultivates Consistency and Discipline: Making yoga a part of your morning routine can foster a sense of discipline and commitment. This consistency not only benefits your yoga practice but can also spill over into other areas of your life, helping you achieve your goals and maintain other healthy habits.
- Enhanced Mood and Emotional Wellbeing: Yoga stimulates the production of endorphins, the body’s natural mood elevators. Starting your day with yoga can help you maintain a positive outlook and emotional balance, improving your interactions with others and your overall sense of wellbeing.
Incorporating yoga into your morning routine can offer a holistic approach to wellness, positively impacting your physical health, mental clarity, and emotional resilience. It’s a powerful way to align your body and mind for the challenges and opportunities of the day ahead.
1. Balasana
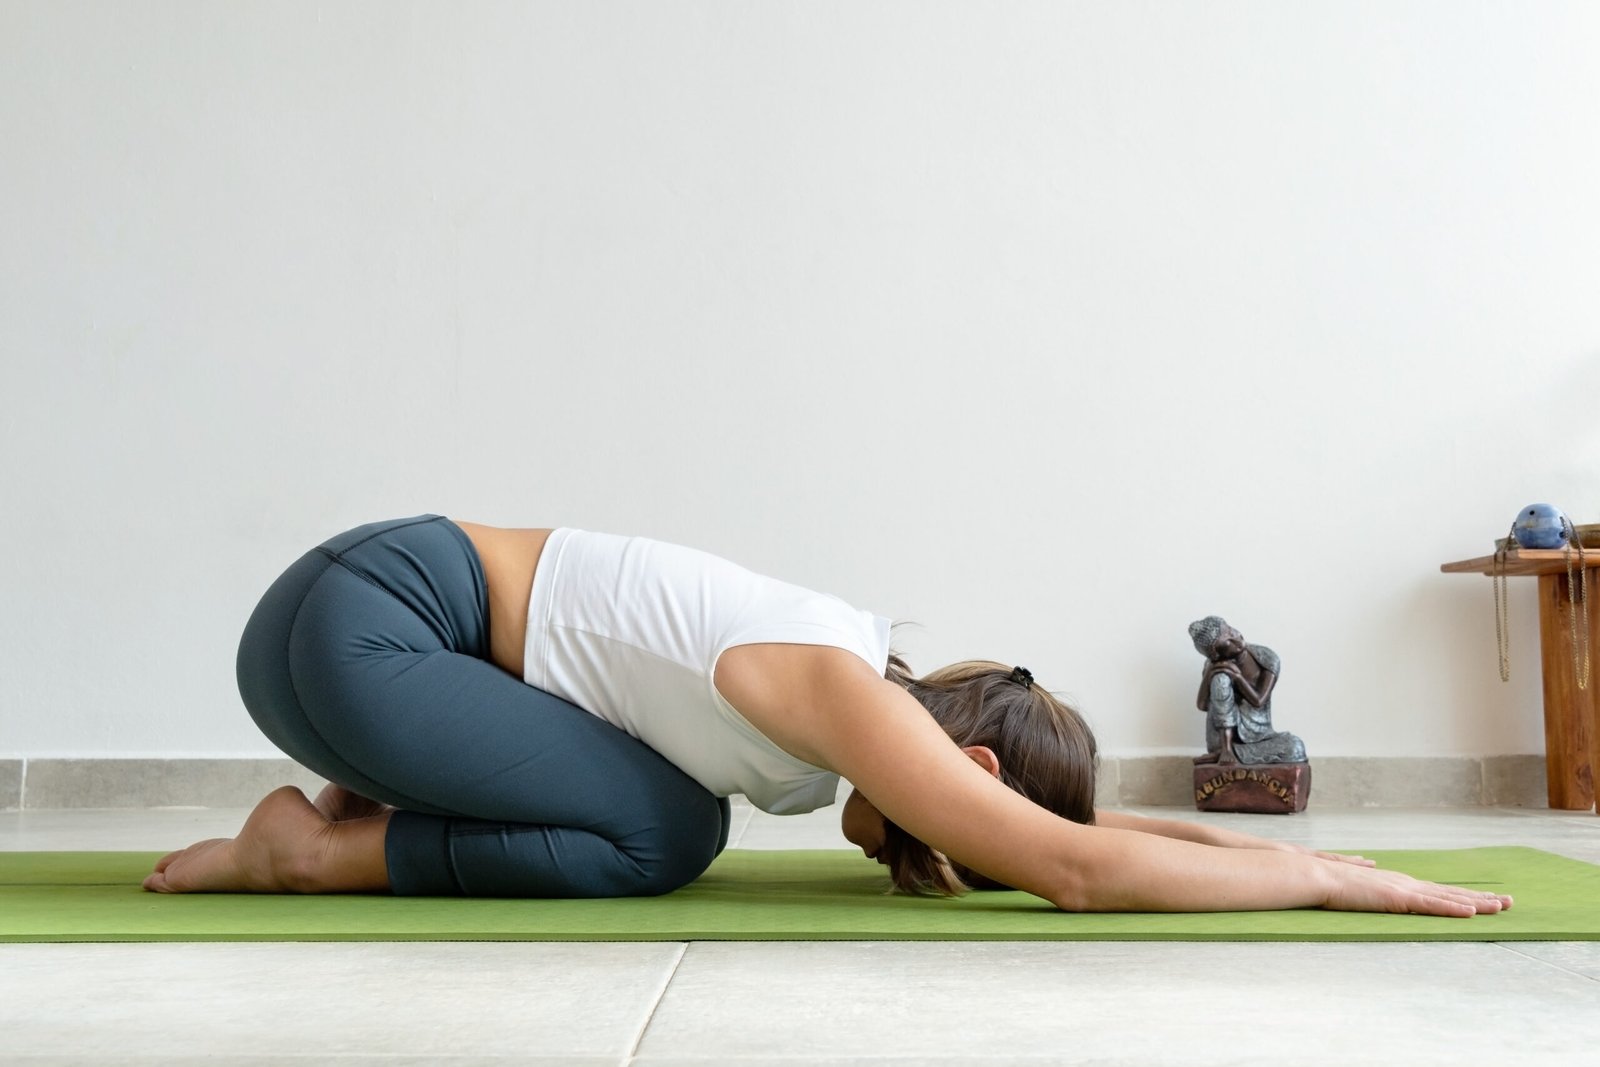
Yes, Child’s Pose, or Balasana (from the Sanskrit words “bala” meaning “child” and “asana” meaning “posture” or “seat”), is a kneeling asana in modern yoga as exercise. It’s a restful pose that can be used at any time during a yoga practice to calm the mind and relieve tension in the body. Here’s a brief overview of how to perform Child’s Pose and its benefits:
How to Perform Child’s Pose:
- Start on Your Knees: Begin in a kneeling position on your yoga mat with your big toes touching and your knees hip width apart or wider if that’s more comfortable for you.
- Sit Back: Exhale as you sit back on your heels. Depending on your flexibility, your buttocks may or may not rest on your heels.
- Fold Forward: Lean forward, extending your arms out in front of you on the mat, and lower your chest between your knees or towards the mat. Your forehead should eventually rest on the floor.
- Arm Position: Extend your arms out in front with your palms facing down for a more active stretch, or bring them alongside your body with your palms facing up for a more restful pose.
- Breathe: Once in position, breathe deeply and allow your body to relax with each exhale. Focus on releasing tension, especially in your back, shoulders, and neck.
- Hold and Release: Stay in the pose for as long as you need, usually between 30 seconds to a few minutes. To release the pose, use your hands to gently push yourself back up to a seated position on your heels.
Benefits of Child’s Pose:
Relieves Stress and Anxiety: The forward bend and enclosed nature of the pose can have a calming effect on the brain, helping to relieve stress and mild anxiety.
Stretches the Lower Back and Hips: It gently stretches the hips, thighs, and ankles, reducing stiffness and improving flexibility in the lower body.
Promotes Flexibility in the Spine: The position encourages the spine to lengthen and stretch, which can help relieve tension in the back.
Encourages Relaxation: The pose promotes relaxation by slowing down breathing and encouraging a state of rest, especially useful during transitions between more challenging poses.
Aids Digestion: The folding action of the abdomen against the thighs can gently massage the internal organs, potentially aiding digestion.
Child’s Pose is a fundamental component of yoga practice, serving as a gentle stretch, a moment of rest, and a posture for grounding and introspection. It’s suitable for practitioners of all levels, including beginners.
2.Bhujangasana
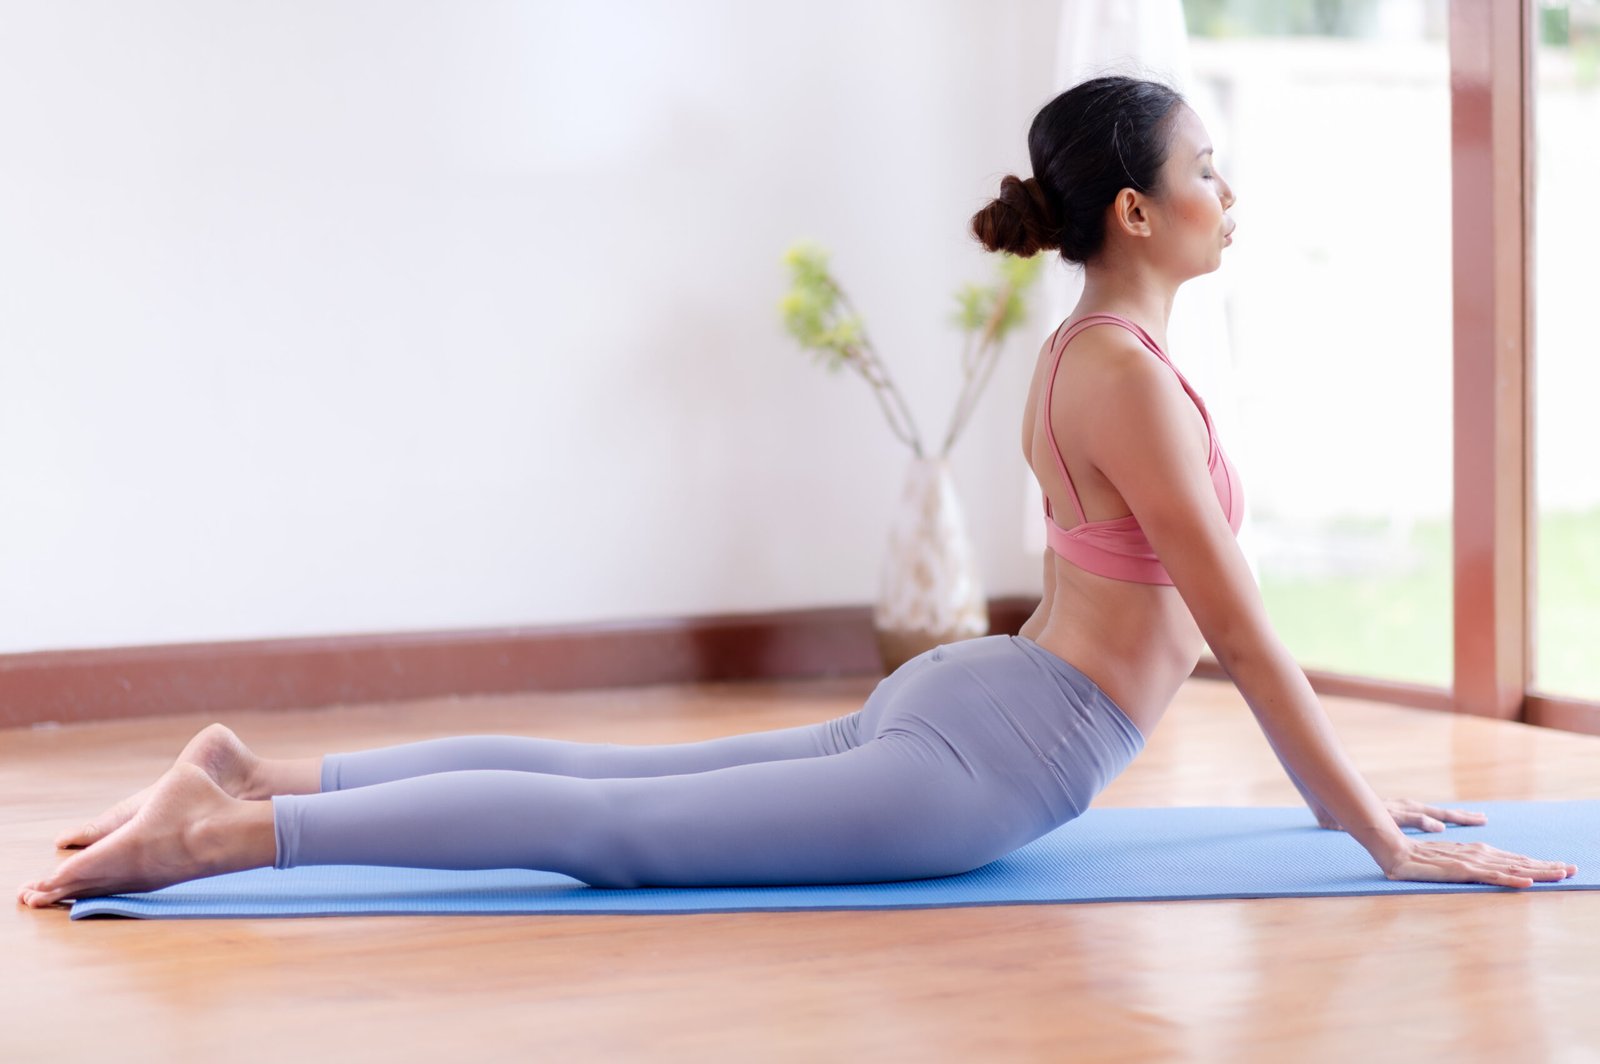
Yes, Cobra Pose, or Bhujangasana (from the Sanskrit “bhujanga” meaning “snake” or “serpent” and “asana” meaning “pose” or “posture”), is a reclining back bending asana in Hatha Yoga and modern yoga as exercise. It’s a fundamental pose often incorporated into sequences like the Sun Salutation (Surya Namaskar). Here’s a brief guide on how to perform the Cobra Pose and its benefits:
How to Perform Cobra Pose:
- Start on Your Stomach: Begin by lying flat on your stomach, legs extended straight behind you, tops of the feet pressing into the mat, and hands placed under your shoulders with elbows close to your body.
- Prepare to Lift: Gently press your pelvis into the floor to anchor your lower body. Inhale as you prepare to lift.
- Lift Into Cobra: Exhale as you straighten your arms to lift your chest off the floor. Go only as high as comfortable, which may mean keeping your elbows bent and your forearms on the ground if you’re a beginner. Your pubic bone should remain in contact with the floor to protect your lower back.
- Engage Your Muscles: Engage your back muscles, and make sure the lift is coming through your spine’s extension rather than just pushing through your hands. Keep your shoulders down and away from your ears.
- Hold and Release: Hold the pose for 15 to 30 seconds, breathing smoothly. To release, exhale and gently lower your chest and forehead back to the mat.
Benefits of Cobra Pose:
Strengthens the Spine: Practicing Cobra Pose strengthens the muscles around the spine, improving its flexibility and resilience.
Stretches Chest and Abdomen: It opens up the chest and stretches the front of the body, including the abdomen, which can increase lung capacity and relieve abdominal cramps.
Stimulates Abdominal Organs: The pose applies gentle pressure to the abdomen, which can stimulate abdominal organs and help improve digestion.
Reduces Stress and Fatigue: By opening the chest, it encourages deep breathing that can be very effective in relieving stress, fatigue, and mild anxiety.
Therapeutic for Asthma: The chest expansion involved in Cobra Pose can be beneficial for individuals with asthma, though it should be practiced under the guidance of a knowledgeable instructor.
Improves Posture: By strengthening the spine and opening the chest, Cobra Pose encourages better posture, especially important for those who spend long hours sitting.
Cobra Pose is accessible to beginners but offers variations and challenges for more advanced practitioners as well. As with any yoga pose, it’s important to listen to your body and modify the pose as necessary to avoid strain, particularly in the lower back.
3. Adho Mukha Svanasana
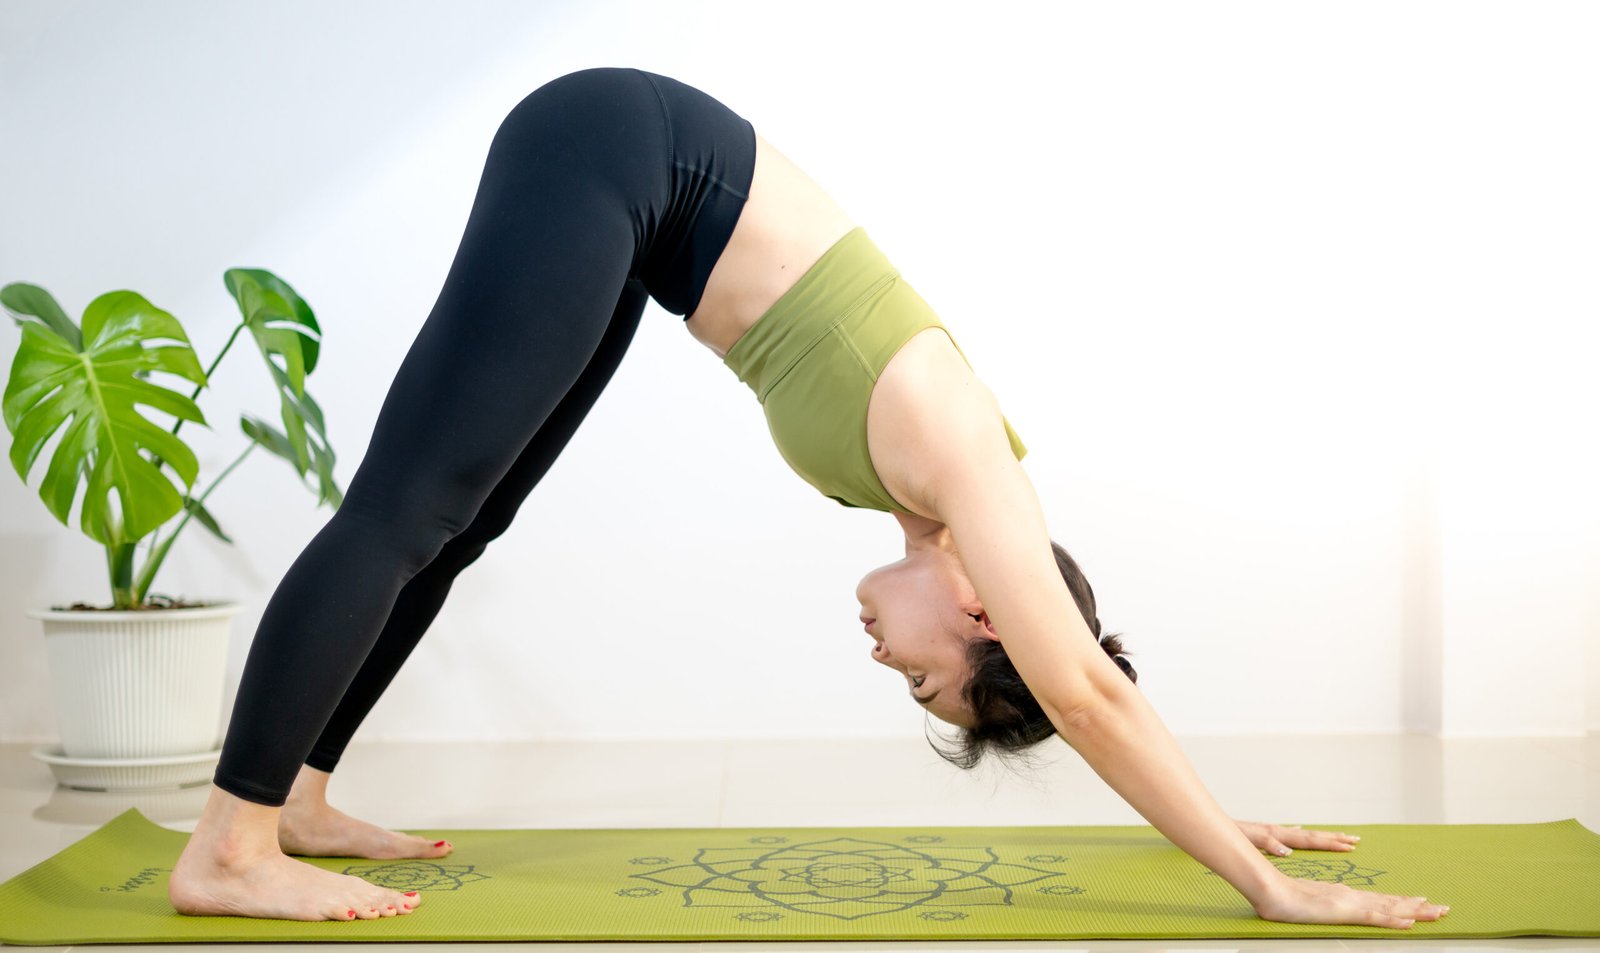
Adho Mukha Svanasana, commonly known as Downward Facing Dog or simply Downward Dog, is a fundamental asana in modern yoga as exercise and a key component of Sun Salutations. The name comes from the Sanskrit words “Adhas” meaning “down,” “Mukha” meaning “face,” “Svana” meaning “dog,” and “Asana” meaning “pose” or “posture.” This asana resembles a dog stretching itself with its head down and back up, hence the name. Here’s a guide to performing Downward Facing Dog and understanding its benefits:
How to Perform Downward Facing Dog:
- Start on Your Hands and Knees: Begin in a tabletop position with your wrists directly under your shoulders and your knees under your hips. Spread your fingers wide and press firmly through your palms.
- Lift Your Hips: Exhale as you tuck your toes under, lift your knees off the floor, and raise your hips toward the ceiling. Your body should form an inverted V shape.
- Align Your Body: Keep your feet hip width apart and your hands shoulder width apart. Initially, you can keep your knees slightly bent to ease into the pose, especially if you have tight hamstrings.
- Adjust Your Hands and Feet: Press firmly into your hands, rotating your arms externally to broaden through the shoulders. Ground down through all four corners of your feet, lifting your sit bones higher as you lengthen your spine.
- Engage and Relax: Engage your quadriceps to take some of the burden off your arms. Draw your shoulder blades down your back, away from your ears, and gaze between your knees or towards your navel.
- Hold and Breathe: Hold the pose for a few breaths, up to one minute or longer, deepening the stretch with each exhale. To release, you can either come back down to your knees into a tabletop position or transition into another pose.
Benefits of Downward Facing Dog:
Strengthens the Upper Body: It builds strength in the shoulders, arms, and wrists.
Stretches the Back and Lower Body: This pose deeply stretches the hamstrings, calves, and the arches of your feet. It also elongates the spine, helping to relieve tension in the back.
Improves Circulation: Being an inversion, it helps increase blood flow to the brain, which can boost energy levels and improve concentration.
Energizes the Body: Regular practice of this pose can help relieve fatigue and rejuvenate the body.
Promotes Bone Health: The weight bearing nature of the pose can help strengthen the bones and improve bone density, which is beneficial in preventing osteoporosis.
Enhances Digestion: The inversion aspect also aids in stimulating digestion by encouraging the movement of the internal organs.
Downward Facing Dog is a versatile pose that serves as both a strengthening and stretching exercise, making it a staple in many yoga routines. It’s suitable for yogis of all levels, with various modifications available to accommodate different needs and abilities.
4. Surya Namaskar
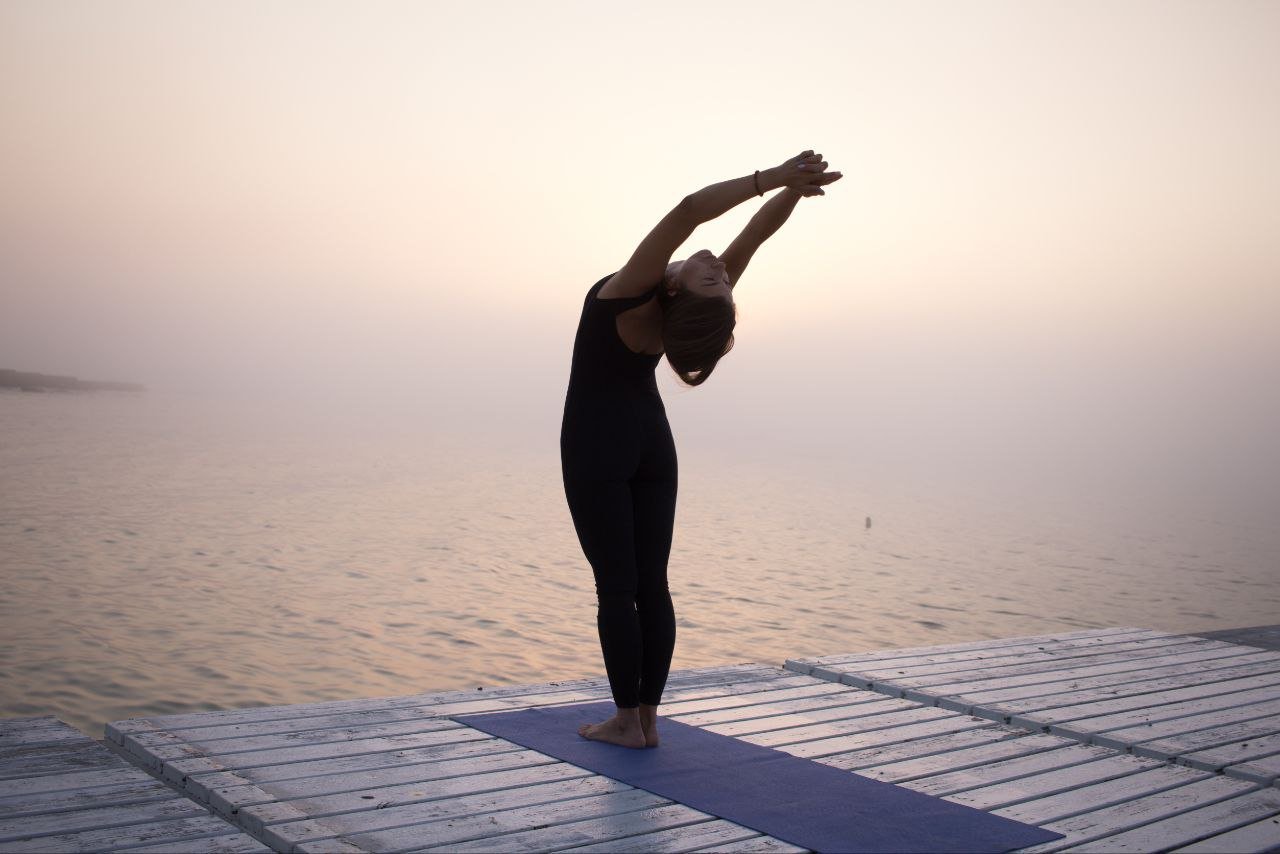
Surya Namaskar, also known as Sun Salutation, is a sequence of yoga poses performed in a flow, traditionally in the morning to greet the new day and the sun. This practice has deep roots in yoga tradition, serving both as a physical exercise and a spiritual practice to express reverence to the sun, considered a source of spiritual and physical energy. Surya Namaskar is a versatile practice that can be a complete exercise in itself or a warm-up to a longer yoga session.
Components of Surya Namaskar
Surya Namaskar typically consists of 12 gracefully linked asanas performed in a sequence. There are several variations of Sun Salutation, with Surya Namaskar A and B being among the most practiced in contemporary yoga. The classic version includes the following sequence:
- Pranamasana (Prayer Pose)
- Hasta Uttanasana (Raised Arms Pose)
- Uttanasana (Standing Forward Bend)
- Ashwa Sanchalanasana (Equestrian Pose)
- Dandasana (Stick Pose)
- Ashtanga Namaskara (Eight Limbed Pose)
- Bhujangasana (Cobra Pose)
- Adho Mukha Svanasana (Downward Facing Dog)
- Ashwa Sanchalanasana (Equestrian Pose), repeating step 4 but with the opposite leg
- Uttanasana (Standing Forward Bend), repeating step 3
- Hasta Uttanasana (Raised Arms Pose), repeating step 2
- Pranamasana (Prayer Pose), returning to the initial pose
Benefits of Surya Namaskar
The benefits of practicing Surya Namaskar are manifold, impacting the practitioner physically, mentally, and spiritually:
Physical Fitness: It strengthens and tones the entire body, including muscles, joints, and skeletal system, and improves flexibility.
Cardiovascular Health: The dynamic nature of the sequence provides a cardiovascular workout, improving heart health and circulation.
Digestive Health: The forward bends and backward bends massage the digestive organs, aiding digestion and helping to detoxify the body.
Energy Boost: Practicing Sun Salutation in the morning revitalizes the body and refreshes the mind, providing energy to start the day.
Concentration and Mental Health: The synchronized breathing and movement enhance focus and mental clarity, reducing stress and anxiety.
Balanced Energy: The sequence is designed to awaken the chakras (energy centers in the body), promoting a balanced flow of energy throughout the day.
Practice Considerations
Warm-up: Although Surya Namaskar can serve as a warm-up, starting with gentle stretches or a slower version of the sequence can prepare the body for more vigorous rounds.
Breath Synchronization: Breathing is key to maximizing the benefits of the sequence. Inhale and exhale as you move into and out of each pose, respectively.
Pace: The sequence can be performed at various speeds according to the practitioner’s level of comfort and the intended effect—slowly for relaxation and meditation, or more rapidly for a physically challenging workout.
Repetitions: Beginners might start with 24 cycles, gradually increasing as they become more comfortable and their stamina improves.
Modifications and Props: Use modifications or props as needed to accommodate physical limitations or to ensure proper alignment.
Surya Namaskar is a holistic practice that nurtures not only physical wellbeing but also mental and spiritual growth. Its adaptability makes it suitable for practitioners of all levels and can be a rewarding addition to any daily routine.
5. Phalakasana
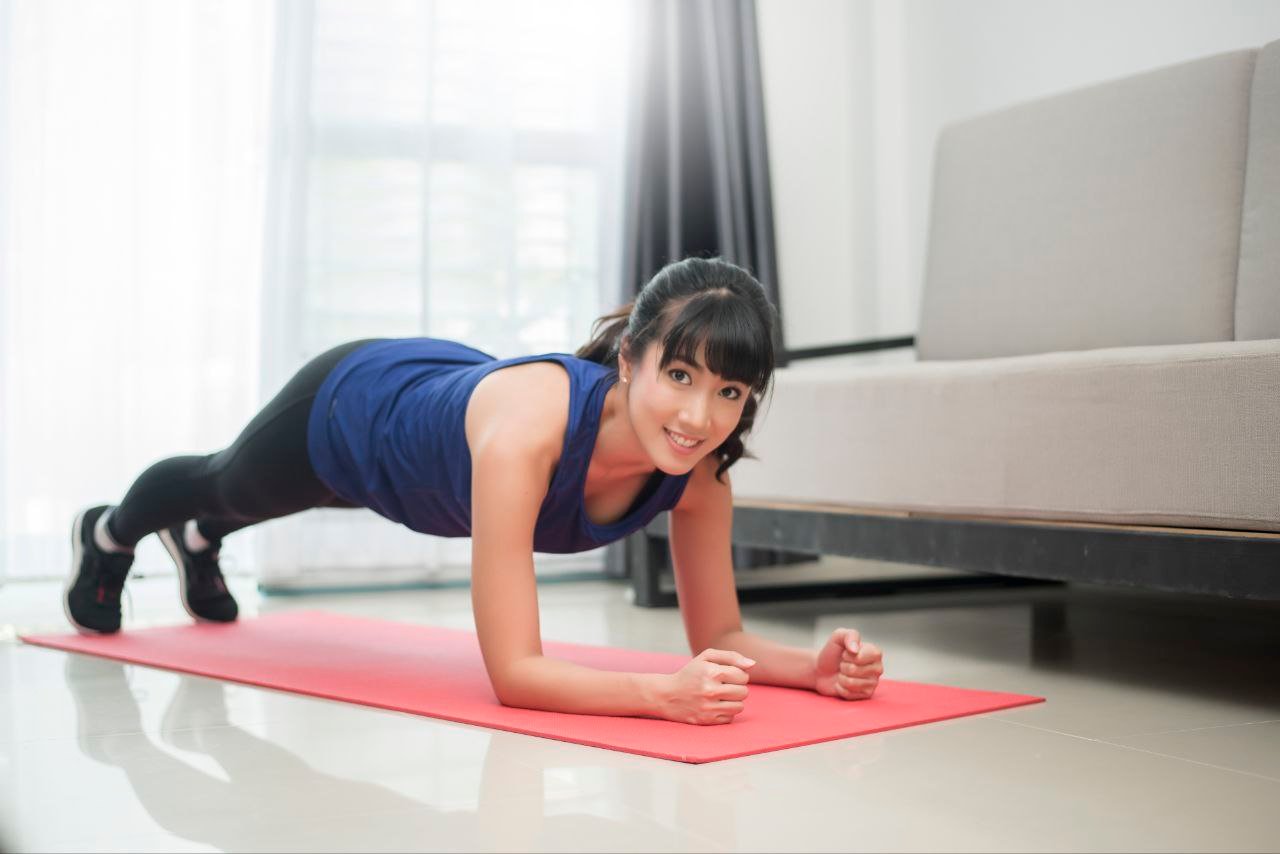
Phalakasana, commonly known as Plank Pose, is a foundational asana in modern yoga practices, particularly in Vinyasa and Hatha yoga. It’s not just a staple in yoga but also a popular exercise in general fitness due to its effectiveness in building strength and stability. This pose lays the groundwork for building core strength, which is essential for a wide range of physical activities and overall bodily health. Here’s how to perform Phalakasana and understand its benefits:
How to Perform Phalakasana (Plank Pose):
- Start in Tabletop Position: Begin on your hands and knees, with your wrists directly under your shoulders and your knees under your hips.
- Step Your Feet Back: Extend one leg at a time back until you are in a high pushup position. Your body should form a straight line from your heels to your head, without sagging or piking at the hips.
- Engage Your Core: Draw your navel towards your spine to engage your abdominal muscles, ensuring your lower back doesn’t sag.
- Position Your Arms: Keep your wrists directly under your shoulders. Spread your fingers wide, and press firmly through your palms and the pads of your fingers.
- Align Your Body: Ensure your shoulders, hips, and heels are in a straight line. Your gaze should be slightly ahead of your hands or down on the ground to keep the neck in a neutral position.
- Hold the Pose: Maintain the pose for a few breaths, working up to longer durations as you gain strength. Beginners might start with holding the pose for 1530 seconds, gradually increasing the time as they become more comfortable.
- To Release: Lower your knees to the floor to come out of the pose, or shift forward to lower yourself down into Chaturanga Dandasana (Four Limbed Staff Pose) if transitioning to another pose.
Benefits of Phalakasana (Plank Pose):
Strengthens Core Muscles: Phalakasana is excellent for building strength in the core muscles, including the abdominals, back, and obliques, which is crucial for stability and preventing back pain.
Builds Arm and Shoulder Strength: Holding your body weight up strengthens the arms, shoulders, and chest.
Enhances Posture: By strengthening the core, Plank Pose helps in maintaining good posture while sitting and standing.
Improves Balance and Stability: The pose challenges your balance, which in turn improves stability in your daily activities and other physical pursuits.
Prepares for More Advanced Poses: A strong Plank Pose lays the foundation for more advanced yoga poses, especially arm balances and inversions.
Phalakasana is a versatile and accessible pose that can be modified to suit different skill levels. For example, beginners or those with wrist discomfort can perform the pose on their forearms, known as Forearm Plank. Adding Phalakasana to your regular yoga practice or workout routine can significantly enhance your strength, stability, and overall physical fitness.
6. Chaturanga Dandasana
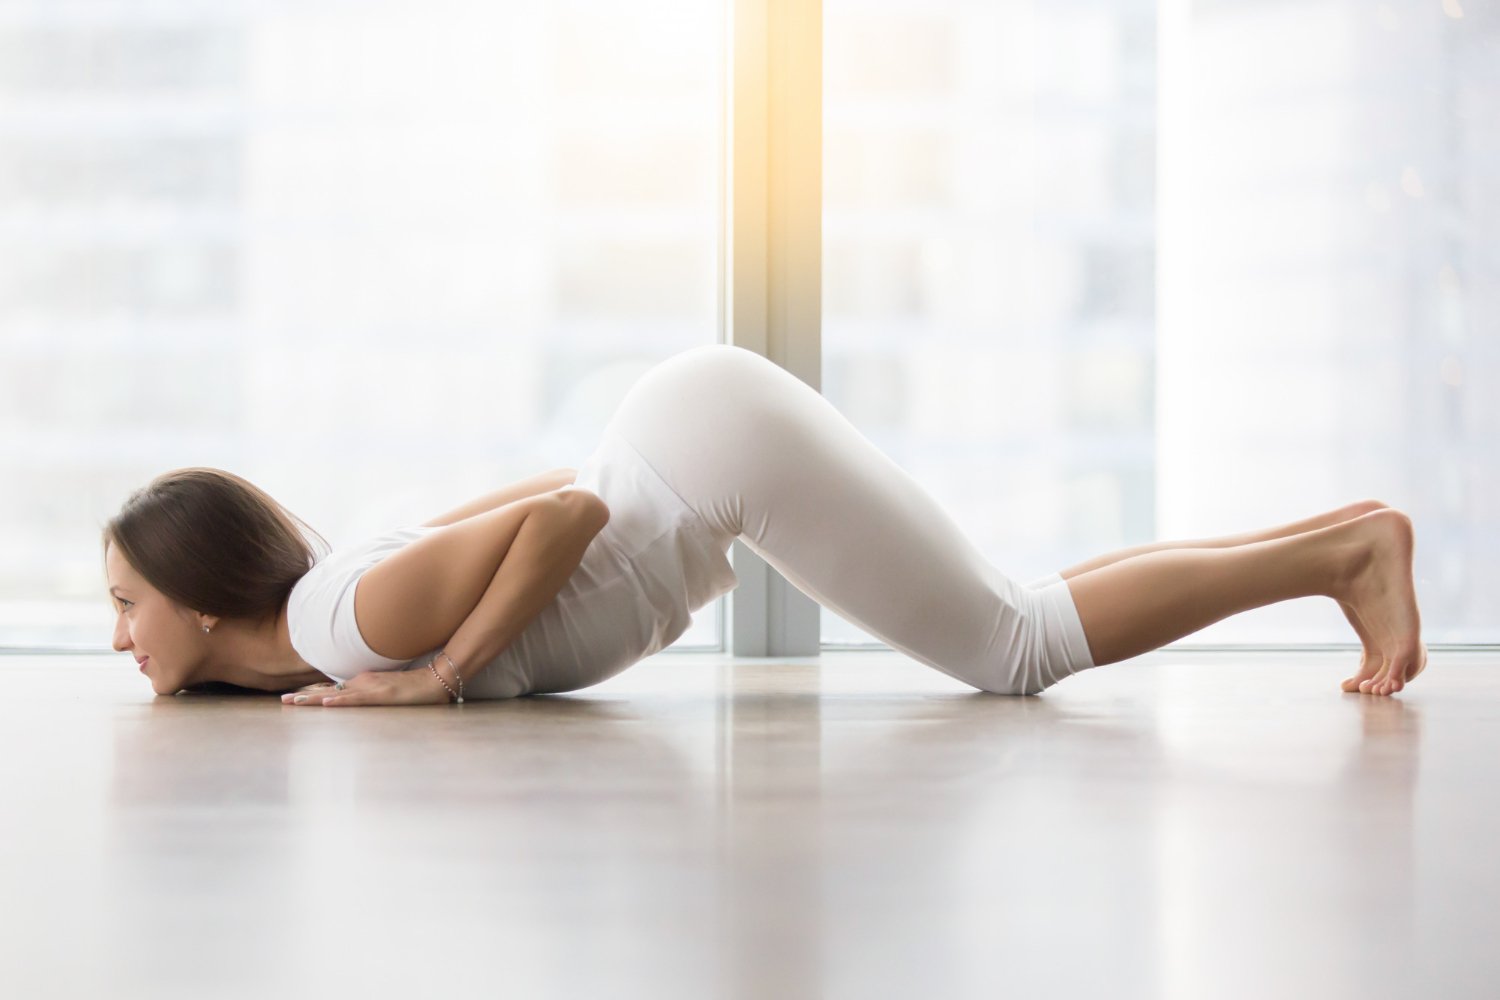
Chaturanga Dandasana, often referred to simply as Chaturanga, is a fundamental yoga pose that is integral to the practice of Vinyasa, Ashtanga, and Power Yoga. The name is derived from the Sanskrit words “Chatur” meaning “four,” “Anga” meaning “limb,” “Danda” meaning “staff,” and “Asana” meaning “pose” or “posture.” The term “Dandasana” translates to “staff pose,” indicative of the body’s alignment in a straight line, reminiscent of a staff or rod. Chaturanga is essentially a low plank position that strengthens and tones the body while preparing the practitioner for more advanced postures.
How to Perform Chaturanga Dandasana:
- Start in Plank Pose: Begin in a high plank position with your shoulders directly over your wrists, your body in a straight line from your heels to your head, and your core engaged.
- Shift Forward: Shift your body slightly forward so your shoulders move past your wrists.
- Lower Down: While keeping your elbows close to your body, lower yourself until your elbows are at a 90degree angle. Your upper arms should be parallel to the floor, and elbows should point straight back, not out to the sides.
- Align Your Body: Keep your body in a straight line from the heels to the head. Avoid letting your hips sag or lift up too high. Your gaze should be directed slightly forward, not down, to maintain a neutral neck position.
- Hold the Pose: Maintain the position for a few breaths or as instructed in a yoga flow. To release, you can lower all the way down to the mat or press up into UpwardFacing Dog (Urdhva Mukha Svanasana).
Benefits of Chaturanga Dandasana:
Strengthens the Upper Body: Chaturanga builds strength in the wrists, arms, shoulders, and chest.
Tones the Core: The pose engages the abdominal muscles, contributing to core stability and strength.
Prepares for Advanced Asanas: Mastery of Chaturanga is crucial for safely progressing to more challenging arm balances and inversions.
Improves Posture: By strengthening the core and upper body, Chaturanga helps in improving posture and spinal alignment.
Common Mistakes and Tips:
Elbow Alignment: Keep your elbows close to your body and do not let them splay outwards.
Core Engagement: Actively engage your core muscles to prevent your hips from sagging and to maintain a straight line through your body.
Shoulder Protection: Avoid dropping too low, as this can put undue strain on your shoulder joints. Stop when your elbows are bent at 90 degrees.
Practice Modifications: If maintaining the full pose is challenging, lower your knees to the floor for a modified version that still strengthens the upper body and core.
Chaturanga Dandasana is a challenging pose that requires strength, stability, and practice to perform correctly. It is a cornerstone pose for many flow sequences and serves as a foundation for building a strong and balanced yoga practice.
7. Urdhva Prasarita Padasana
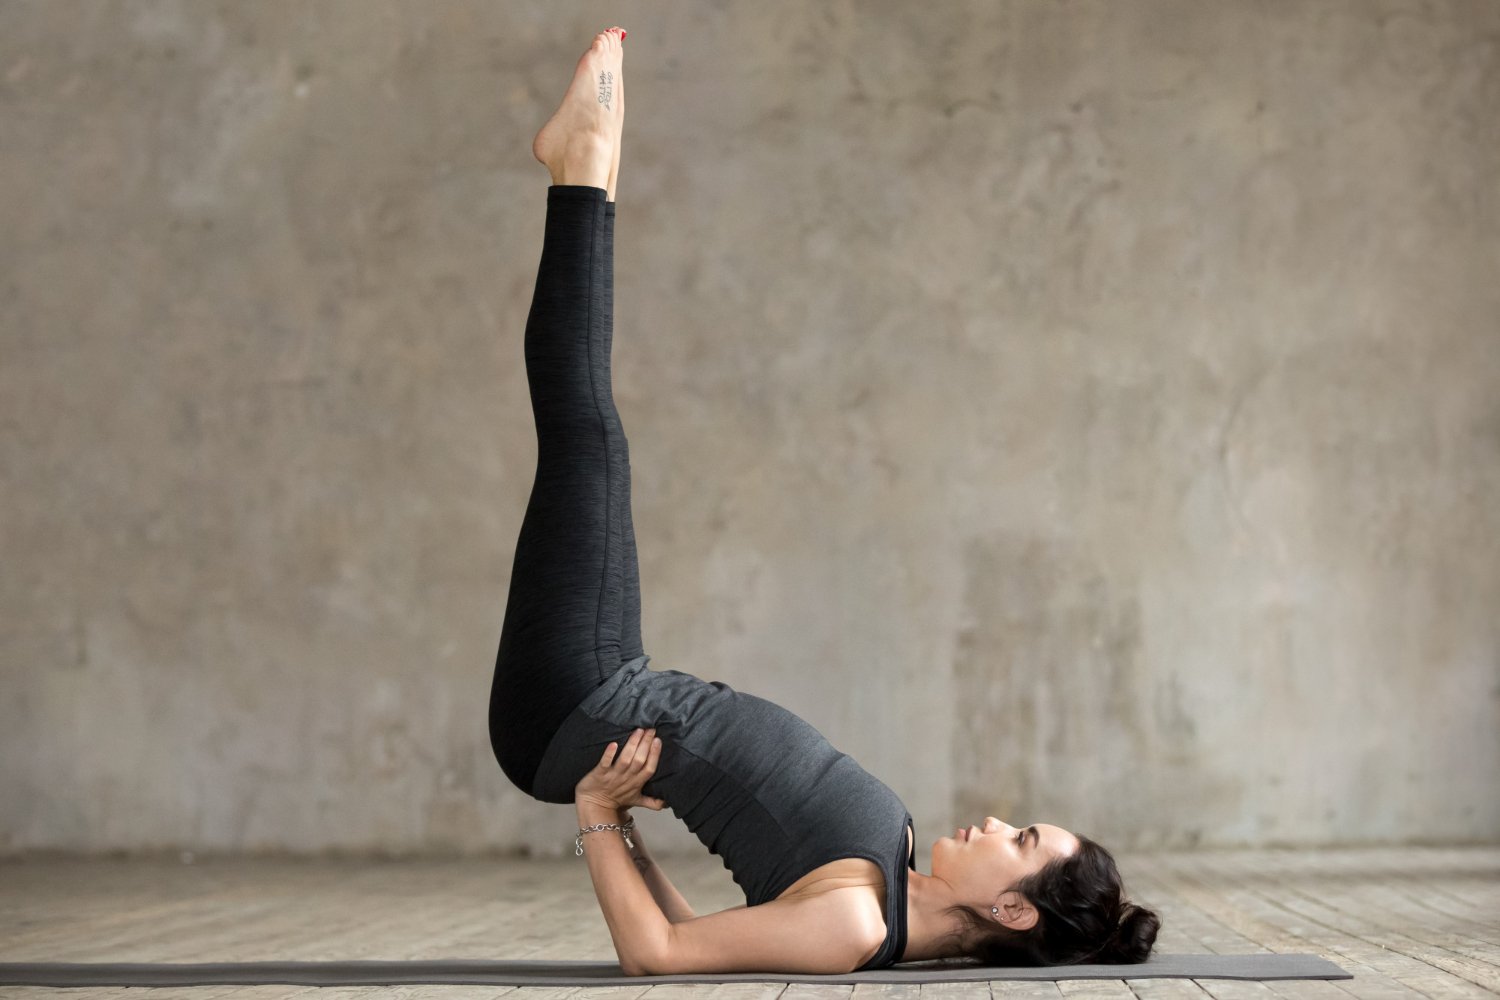
Urdhva Prasarita Padasana, often translated as Upward Extended Feet Pose, is a yoga posture that primarily targets the abdominal muscles, improving core strength and stability. It also enhances flexibility in the legs and helps in developing balance and concentration. Here’s how you perform it and what benefits you can expect:
How to Perform Urdhva Prasarita Padasana:
- Start Position: Begin by lying flat on your back on a yoga mat, with your legs extended together and your arms resting alongside your body, palms facing down.
- Inhale and Lift: On an inhalation, engage your core muscles and lift both legs off the floor to a 90degree angle, keeping them straight and together. Your body should form an L shape. Ensure your lower back remains pressed into the floor to avoid straining it.
- Arm Position: You can keep your arms alongside your body for support, or for more intensity, extend them overhead on the floor, keeping them straight and parallel to each other.
- Hold the Pose: Hold this position, breathing deeply and steadily. Keep your core engaged, and focus on keeping your legs straight and your back flat against the mat.
- Lower the Legs: After holding the pose for several breaths (beginners might start with 1530 seconds and gradually increase the duration), exhale and carefully lower your legs back to the starting position.
Modifications:
To make the pose easier, especially if maintaining straight legs is challenging, you can slightly bend your knees.
To increase the challenge, lower your legs closer to the floor (without touching it) before lifting them back to the 90degree position, ensuring your lower back does not arch off the floor.
Benefits of Urdhva Prasarita Padasana:
Strengthens the Core: This pose is excellent for building strength in the abdominal muscles, which is crucial for overall body stability and protecting the lower back.
Improves Leg Flexibility: Regular practice can enhance the flexibility of the hamstrings and calf muscles.
Stimulates Abdominal Organs: The pose massages and stimulates the organs in the abdomen, which can help improve digestion.
Enhances Focus and Concentration: Maintaining the pose requires concentration, which can help improve focus and mental clarity.
Cautions:
Individuals with lower back issues should approach this pose with caution and perhaps consult a healthcare provider or an experienced yoga instructor before attempting it.
Avoid this pose or modify it if you experience any pain, especially in the back or hips.
Urdhva Prasarita Padasana is a versatile pose that can be adapted to different skill levels and incorporated into various sequences, making it a beneficial addition to your yoga
8. Supta Matsyendrasana
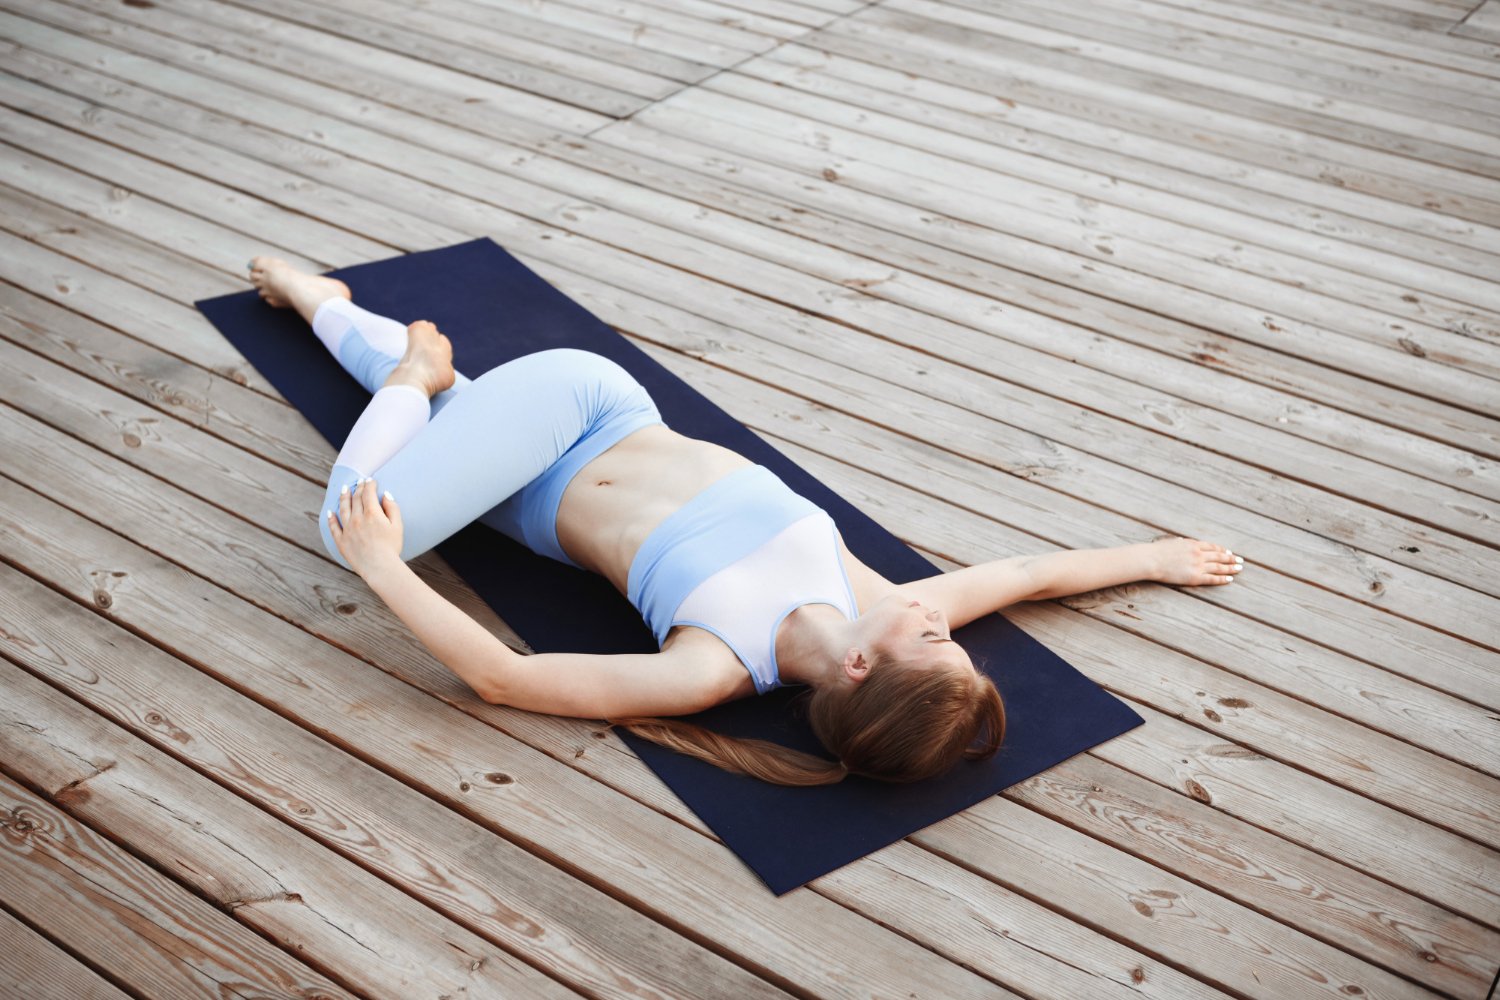
Supta Matsyendrasana, also known as Supine Spinal Twist or Reclining Twist, is a restorative yoga pose that promotes flexibility and helps release tension in the spine. It’s often used as a gentle way to wind down a practice or as a soothing posture on its own. The pose involves lying on your back and twisting your lower body to one side, which stretches the back muscles and glutes while massaging the abdominal organs. Here’s a stepbystep guide to performing Supta Matsyendrasana, along with its benefits:
How to Perform Supta Matsyendrasana:
- Start Position: Begin by lying on your back on a comfortable, flat surface, with your legs extended straight and your arms out to the sides in a Tshape or cactus arms, palms facing down or up as preferred.
- Bend Your Knees: Bring your knees towards your chest, keeping them together.
- Twist: Exhale as you gently lower both knees to one side of your body, keeping both shoulders firmly on the ground. The twist should come from your waist; your chest should remain facing upwards.
- Adjust Your Gaze: You can turn your head to look in the opposite direction of your knees for a deeper neck stretch, but this is optional based on comfort and neck flexibility.
- Hold the Pose: Stay in this position for several breaths, ideally 15 minutes, allowing your muscles to relax and the gravity to deepen the twist naturally.
- Return to Center: On an inhalation, gently bring your knees and head back to the center.
- Repeat on the Opposite Side: Lower your knees to the other side, ensuring to keep your shoulders pressed to the floor, and hold for the same duration.
Benefits of Supta Matsyendrasana:
Spinal Flexibility: This pose encourages mobility and flexibility in the spine, which can help alleviate stiffness and back pain.
Digestive Health: The twisting motion massages the abdominal organs, stimulating digestion and helping to detoxify the body.
Stress Relief: As a gentle restorative pose, it calms the mind and can help relieve stress and tension.
Improved Circulation: The twisting action helps to stimulate blood circulation throughout the spine and abdominal organs.
Opens Chest and Shoulders: Depending on the arm position, the pose can also help stretch and open the chest and shoulders.
Cautions:
If you have any serious spinal issues or injuries, it’s best to consult with a healthcare provider before attempting this pose.
Pregnant women should avoid deep twists, but a very gentle version of this pose, with the knees not dropping too far to the side, may still be comfortable.
Always listen to your body and avoid pushing into pain. Use cushions or bolsters for support if needed.
Supta Matsyendrasana is a versatile pose that can be modified to suit different levels of flexibility and can be a nurturing addition to any yoga practice.
9. Savasana
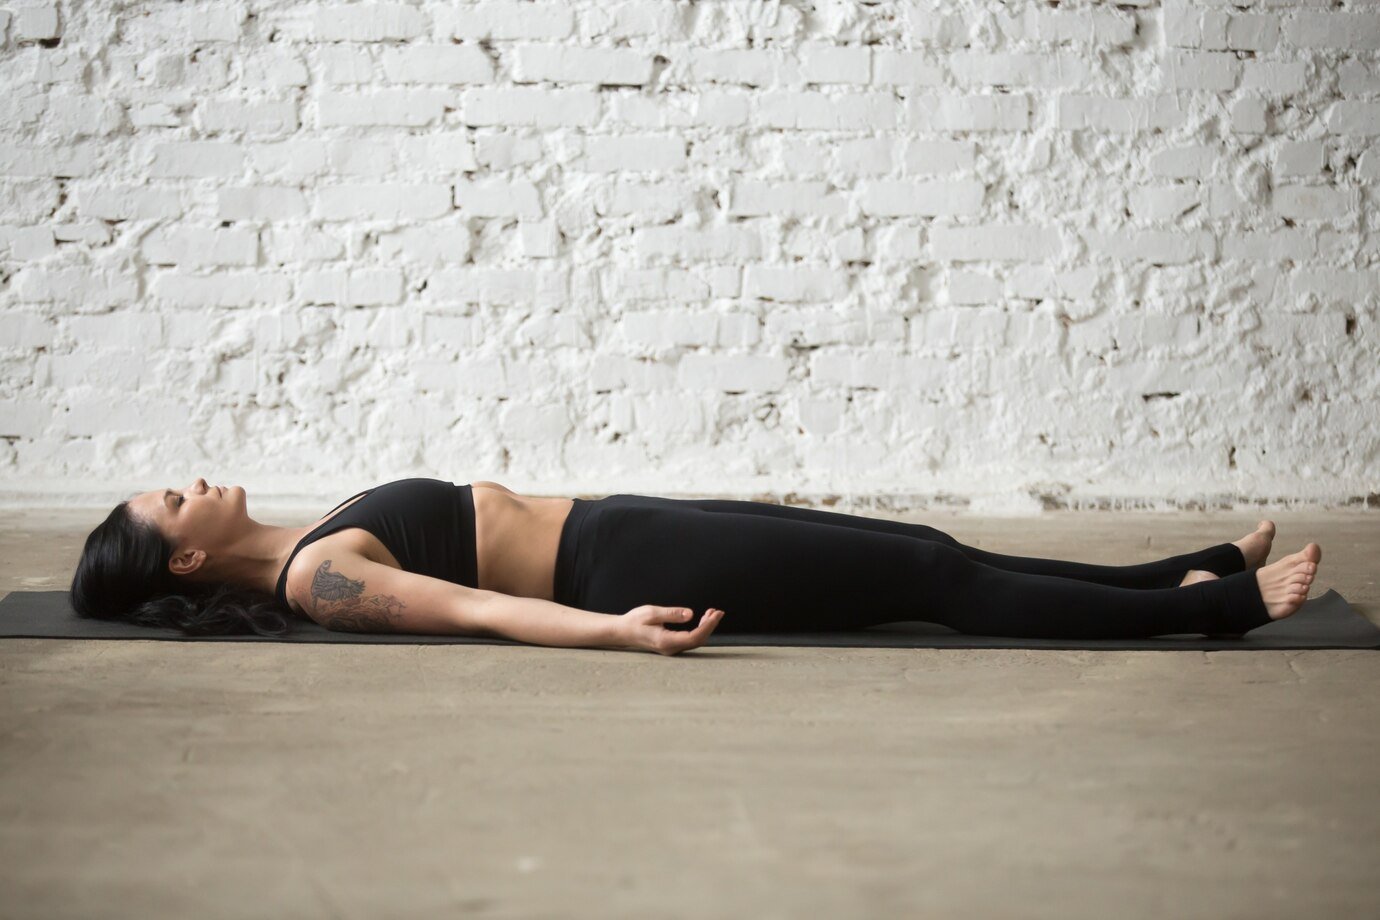
Savasana, known as Corpse Pose, is often used to conclude a yoga session, allowing the body to fully relax and integrate the benefits of the practice. Despite its simplicity, Savasana is considered by many to be one of the most challenging asanas because it requires the practitioner to be completely still and mentally aware, yet fully relaxed. Here’s how to perform it and understand its benefits:
How to Perform Savasana:
- Position Yourself: Lie flat on your back on a yoga mat. Ensure your surroundings are quiet and comfortable to facilitate relaxation. Use a thin pillow under your head if necessary, and a bolster or rolled blanket under your knees can help alleviate lower back discomfort.
- Relax Your Body: Allow your legs to splay slightly apart, naturally, with your toes falling to the sides. Place your arms alongside your body, palms facing up and slightly away from your body, giving your armpits room to breathe.
- Adjust and Settle: Make any minor adjustments to ensure you’re comfortable. Close your eyes and take a deep breath in through your nose, then exhale gently through your mouth, signaling your body to relax.
- Breathe and Release: Shift your attention to your breath, breathing naturally. With each exhale, consciously release tension from each part of your body, starting from your toes and moving upwards to the crown of your head.
- Stay Present: Try to keep your mind clear of wandering thoughts, focusing on your breath or a single point of meditation. If your mind does wander, gently acknowledge the thought and then return your focus to your breath or point of meditation.
- Duration: Remain in this pose for 510 minutes or longer if you have the time. The longer you stay, the deeper the relaxation.
- To Exit: Do not rush to get up. Start by deepening your breath, and then gently wiggle your fingers and toes. Roll onto one side, keeping your eyes closed, and rest there for a moment. Use your hands to help you sit up, then slowly open your eyes.
Benefits of Savasana:
Promotes Relaxation: Helps relieve physical and mental stress, reducing symptoms of anxiety and depression.
Improves Concentration: By calming the mind, Savasana can improve focus and concentration.
Enhances Recovery: Allows the body to absorb the benefits of the yoga practice, promoting recovery and healing.
Lowers Blood Pressure: The deep relaxation state can help lower blood pressure and reduce the heart rate, promoting cardiovascular health.
Improves Sleep: Regular practice, especially before bedtime, can improve sleep quality.
Tips for Savasana:
If you tend to get cold, cover yourself with a blanket.
If your eyes don’t feel comfortable fully closed, place an eye pillow or a lightly folded cloth over your eyes.
Practice Savasana in a quiet, dimly lit room to enhance relaxation.
Although Savasana might seem simple, it’s a powerful tool for deep relaxation and rejuvenation, making it an essential part of yoga practice.
Is it Beneficial to do yoga every morning?
yes, it is Reduce anxiety, make strong Mental clarity give Better sleep, Flexibility and strength.
What happens if do yoga every morning?
Not only does it heal your mind and body, but it also gives you energy, positivity & can help you elevate your work right from the moment you do the asana.
